Hello dear readers,
I finally completed the trailer project. I enjoyed working on it. Along the way I learned new methods of working with foam-core.
The trailer, complete with everything inside and outside, weighs only 550 grams. Goldie and Sarit together created the plans + the drawings and conducted the workshop.
Before the first meeting, we, each received, through WhatsApp, printed drawings and instructions (In Hebrew) to prepare ahead at home.
When we got together we brought with us the almost completed shells of the trailers. We started
making the furniture and took back homework. It was almost an online project when most of the work was done at home and a lot of fun and laughter was held at the meeting.
I left the last finishing touches for the meeting, but since I'll not be able to go, I finished my
trailer the best way I could and shall send photos to my friends at the meeting. In return, if and when I'll receive photos of my friends work I'll share them with you.
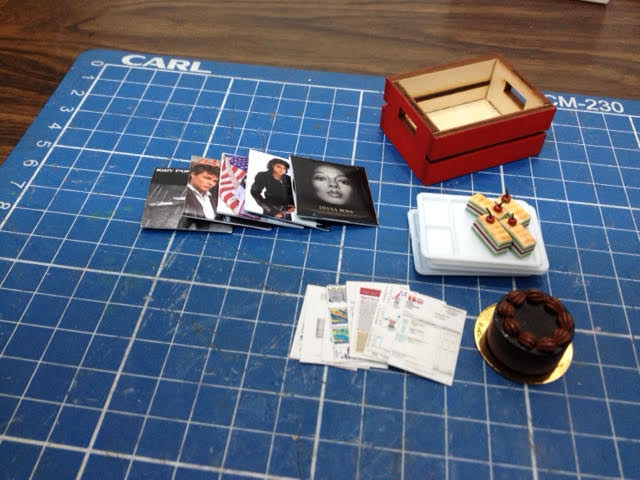
Bellow are photos of my finished work. It is not a very good day for taking photos but you'll
be able to see what was done. As you see, I decided on the clear, see-through roof. But I also
have a mat spare roof just in case I'll want a change.


The last photo is one which gives a better view of the interior.
I hope everything goes well tomorrow with my husband. Thank you all for your kind works and
good wishes.
Enjoy a good weekend with my blessings!
I finally completed the trailer project. I enjoyed working on it. Along the way I learned new methods of working with foam-core.
The trailer, complete with everything inside and outside, weighs only 550 grams. Goldie and Sarit together created the plans + the drawings and conducted the workshop.
Before the first meeting, we, each received, through WhatsApp, printed drawings and instructions (In Hebrew) to prepare ahead at home.
When we got together we brought with us the almost completed shells of the trailers. We started
making the furniture and took back homework. It was almost an online project when most of the work was done at home and a lot of fun and laughter was held at the meeting.
I left the last finishing touches for the meeting, but since I'll not be able to go, I finished my
trailer the best way I could and shall send photos to my friends at the meeting. In return, if and when I'll receive photos of my friends work I'll share them with you.
Bellow are photos of my finished work. It is not a very good day for taking photos but you'll
be able to see what was done. As you see, I decided on the clear, see-through roof. But I also
have a mat spare roof just in case I'll want a change.


The last photo is one which gives a better view of the interior.
I hope everything goes well tomorrow with my husband. Thank you all for your kind works and
good wishes.
Enjoy a good weekend with my blessings!